Film Inspection for Medical Products
Process Optimisation and Cost Reduction by Standards
Today, manufacturers of high-quality plastic films usually check 100 percent of their production with inspection systems, i.e. image processing systems for optical quality control. What defects can the systems detect? Can the measurement data be used for process control? What is the technical standard and how are the inspection systems used?
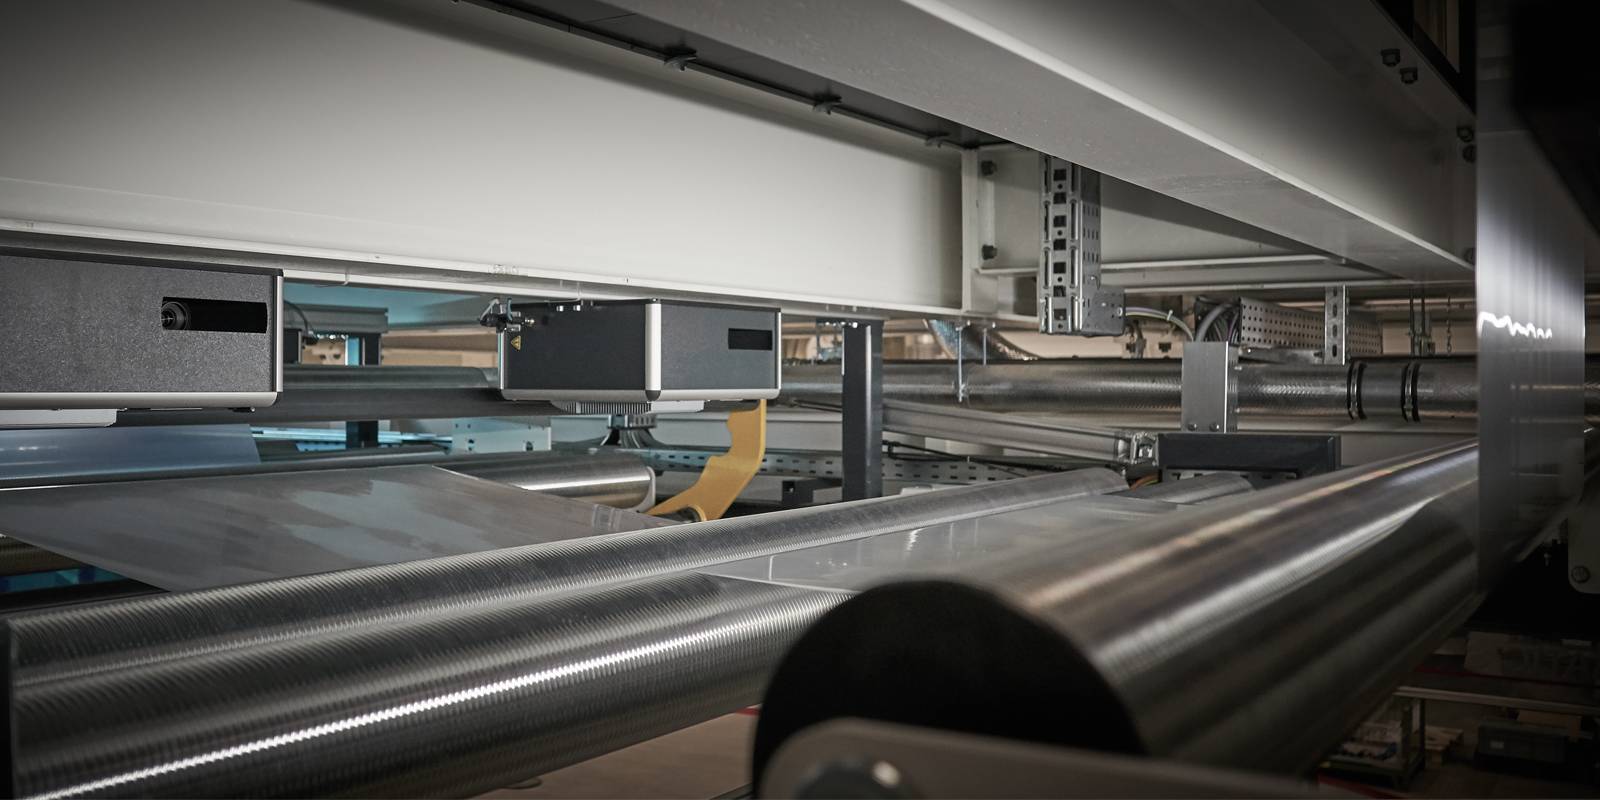
Film inspection systems are increasingly becoming a mandatory component of production lines. On the one hand, customers from the pharmaceutical, medical and food industries demand 100 per cent quality control; on the other hand, film manufacturers want to avoid costly rejects and optimise their production process. Cameras monitor the film webs directly after extrusion, the image processing software marks the defects in the film and alerts the operator immediately. Here, the process itself, the raw material and the end product are monitored.
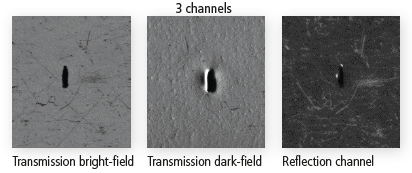
Even at very high web speeds, high resolutions in the direction of web flow can be achieved by using high-speed cameras. Dual-line cameras, together with high-quality LED lighting, enable so-called Multi Channel Evaluation (MCE). In this process, the same defect is recorded by one and the same camera with two different lighting systems, for example in transmission in the bright field and in the dark field (Fig. 1).
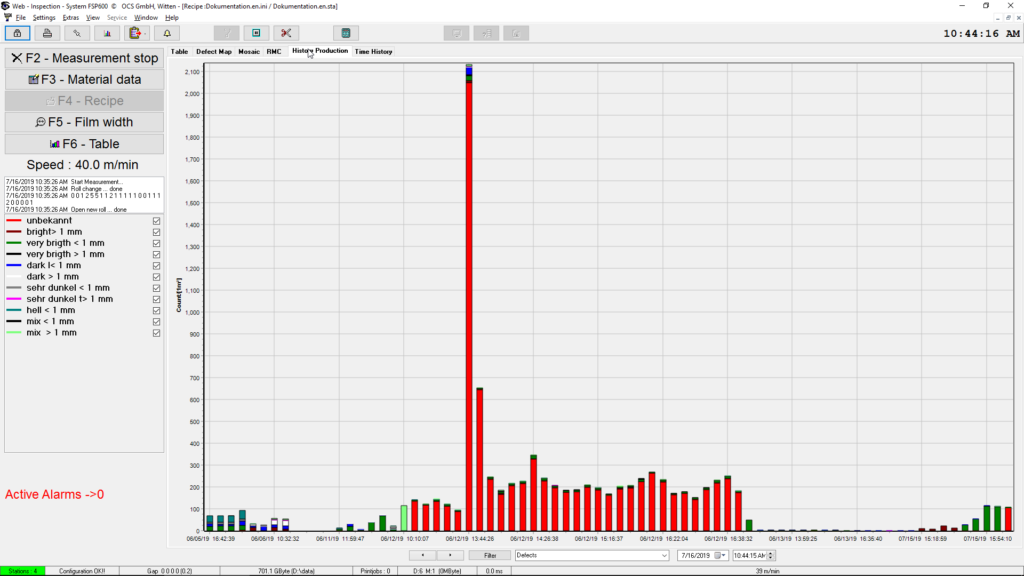
It is also interesting to use an RGB infrared LED (red/green/blue) that detects the same error in the respective wavelength range and then combines the different channels. This is possible with the help of the OCS FSP600 MCE (Multi Channel Evaluation). This procedure leads to both improved detection and classification. However, simple and user-friendly teach-in software is indispensable for this. External sensors such as shrinkage measurement or colour measurement can also be integrated into these inspection systems via interfaces. Here, the LAB colour space values are documented and alarms are set accordingly in case of deviations. The modern image processing systems detect surface defects such as black specks or gels. Based on the defect images (so-called mosaic images), the operator can teach the defects into the system and the system then automatically determines the classification categories for the defect types (Fig. 2). The horizontal axis of the diagram shows the produced rolls (in order of date/time) and the vertical axis shows the absolute defects. The respective bar chart in turn shows the defects by size classes.
Classification of Film Defects
There is a difference in the classification of film defects:
- Specks / Gels (non-melted material or cross-links – in transparent film similar to a drop of water)
- Burners/black specks (cracked or burnt material – brownish or black)
- Fish eye (non-melted material or cross-links – often in opaque film with subsequent thinning; this defect is, however, often identified like a speck).
- Coating cracks/holes, streaks, flow lines and insects
The different types of defects have different causes and also generate different problems during further processing. However, there is no common standard for the typologisation of these errors. There can thus be considerable differences in the description, depending on which quality standards are used. For this reason, it is important to deal with this topic proactively and to include both the supplier and the customer in this topic with regard to defect typology as well as resolution or size detection. This increases the competitiveness of a company considerably.
Inspection of Extruded Films in Production
As mentioned above, producers of high-quality films control 100 per cent of their production with film inspection systems. These systems detect the film defects catalogued at the beginning, such as specks and burn marks. They monitor the extrusion process itself, the raw material (polymer) and the end product, the film. Surface inspection systems monitor the film web in transmitted light (transparent and translucent films) or in reflection (opaque films). A combination of both lighting arrangements is also possible if both transparent and opaque films are produced or processed on the same line. Based on the defect images, the operator can teach the defects into the image processing system and the system then automatically determines the classification criteria for the defect types. The alarms are triggered, for example, in the case of critical individual defects (such as a fly), defect trends (for example, more than 10 gels with diameters of more than 200 to 300 mm per m²) or roll or use defects that are outside the specification.
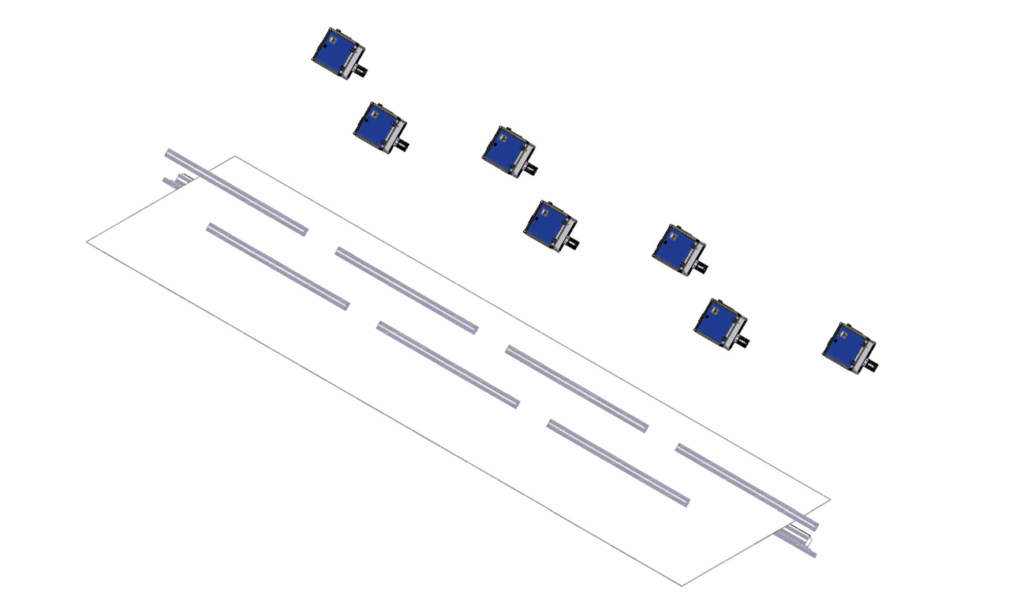
This data are stored in the system and can be accessed at any time, for example in the event of a complaint. Production trends over longer periods of time can be displayed online, for example over the last 12 hours. Offline, entire campaigns can be compared or evaluated, for example to assess raw material batches in connection with certain extruders with regard to the frequency of specks. Furthermore, the system provides print protocols of the roll quality adapted to the needs of the producer. However, the defect size and also the alarming from a certain frequency must be specified by the customer (user). This should be done in accordance with the end customer. Nowadays, speeds of up to 1,200 m/min (slitter rewinders) and widths of up to 10,000 mm (biaxial stretching systems) are monitored as standard in the film sector. Fig. 3, for example.
The resolution range varies and basically depends on the specifications of the end customer and the production process. In the production of pharmaceutical films, laminations and PVDC coatings, system resolutions of around 200 μm are used because, among other things, defects such as holes, insects or burn marks of 0.1 mm² must be reliably detected. These are marked in the production process and then cut out in the finishing process. The equipment is validated and the results are easy to manage with data archiving and data management software and are available for at least 10 years. Furthermore, other process parameters such as the recipe, machine parameters or other measurement parameters such as the thickness profile are available with each inspection protocol and can be correlated. This data is read into the inspection system online via an OPC interface.
